
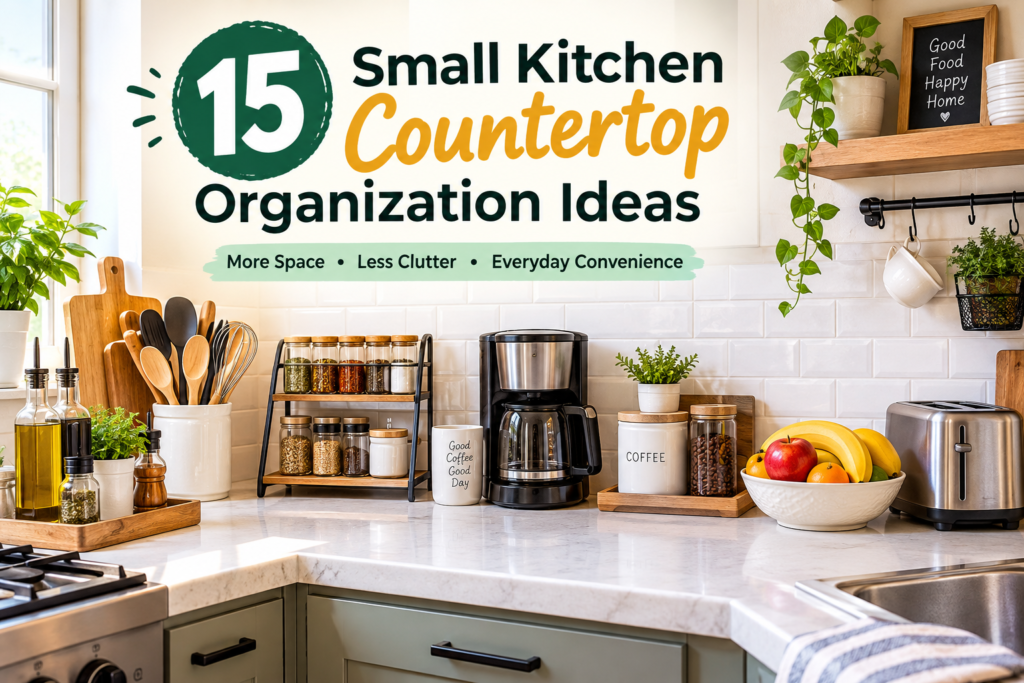
A small kitchen countertop can become cluttered surprisingly fast.
A coffee maker, toaster, knife block, cooking oils, utensils, appliances, mail, and everyday items can quickly take over the limited workspace you actually need for cooking.
The goal isn’t to remove everything from the counter. It’s to decide what deserves countertop space, what should be stored elsewhere, and how the remaining essentials can be organized more efficiently.
These small kitchen countertop organization ideas focus on practical ways to reduce visual clutter, create more usable workspace, and keep everyday kitchen essentials within easy reach—without requiring a major remodel.
These small kitchen countertop organization ideas are designed to help you create a cleaner, more functional workspace without making major changes to your kitchen.
Quick Guide: Which Countertop Organization Idea Fits Your Kitchen?
| Organization Idea | Best For | Effort | Main Benefit |
|---|---|---|---|
| Declutter first | Crowded counters | Easy | Creates immediate space |
| Coffee station | Coffee & tea | Easy | Keeps essentials together |
| Tiered organizer | Small items | Easy | Uses vertical space |
| Utensil crock | Cooking tools | Easy | Keeps tools accessible |
| Knife organizer | Knives | Easy | Frees drawer/counter space |
| Corner organizer | Dead corners | Easy | Uses overlooked space |
| Appliance zone | Small appliances | Easy | Creates visual order |
| Oil & sauce tray | Bottles | Easy | Contains spills and clutter |
| Sink organizer | Cleaning supplies | Easy | Keeps sink area tidy |
| Countertop shelf | Limited storage | Easy | Adds another level |
| Wall storage | Crowded counters | Medium | Moves items off the counter |
| Everyday tray | Daily essentials | Easy | Groups loose items |
| Fruit bowl | Produce | Easy | Keeps fruit contained |
| Charging zone | Phones & devices | Easy | Prevents cable clutter |
| Daily-use zone | Essentials | Easy | Keeps useful items accessible |
1. Start by Decluttering the Countertop
Before buying a single organizer, remove everything from the countertop.
These small kitchen countertop organization ideas work best when you first remove items that do not need to stay on the counter.
Separate items into three groups:
- Use every day
- Use occasionally
- Doesn’t belong on the countertop
Then put the second and third groups somewhere else.
A countertop is valuable workspace. If an appliance is used once every few weeks, keeping it permanently on the counter may not be the best use of that space.
Why this works: You may discover that your kitchen doesn’t actually need more storage—it needs less stuff competing for the same surface.
Quick test
For each item, ask:
“Would I miss this if it wasn’t on the counter tomorrow morning?”
If the answer is no, consider storing it elsewhere.
2. Create a Compact Coffee or Tea Station
If you make coffee or tea every day, grouping those items together can make a small countertop feel much more intentional.
Keep the essentials in one area:
- Coffee maker or kettle
- Coffee or tea
- Mugs
- Sweetener
- Filters
- Frequently used accessories
A small tray or compact shelf can help define the station without spreading everything across the counter.
Pros
- Keeps daily essentials together
- Makes the morning routine easier
- Creates a visually defined zone
Cons
- Can consume valuable counter space
- Works best when limited to genuinely useful items
Best for: Kitchens where coffee or tea preparation happens several times a day.

3. Use a Tiered Countertop Organizer
When countertop space is limited, think vertically.
A two- or three-level organizer can provide additional storage without requiring a wider footprint.
Use one for:
- Spices
- Coffee supplies
- Tea
- Small jars
- Cooking essentials
- Frequently used condiments
One of the most useful small kitchen countertop organization ideas is to use vertical space instead of spreading items across the counter.
Instead of spreading items across a large section of the counter, you create layers within the same footprint.
Tip: Measure the space between your countertop and upper cabinets before choosing a tall organizer.
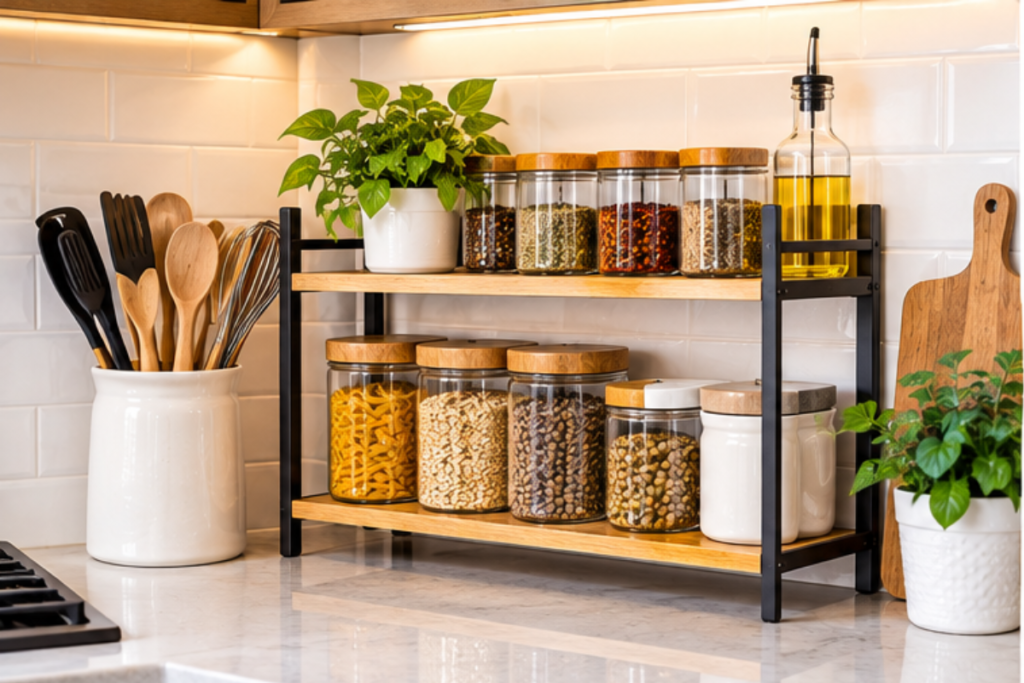
4. Keep Cooking Utensils in a Vertical Crock
Frequently used cooking tools don’t always need to occupy a drawer.
A utensil crock can hold spatulas, wooden spoons, whisks, tongs, and other tools you reach for regularly.
However, don’t turn the crock into a storage dump.
Keep only your most frequently used utensils there. Store duplicates and specialty tools in a drawer or cabinet.
Better setup
Countertop: 8–12 everyday tools
Drawer/cabinet: specialty and duplicate tools
This keeps the countertop functional without making it look overcrowded.
5. Rethink Your Knife Storage
A traditional knife block can take up more countertop space than expected.
If counter space is extremely limited, consider alternatives such as:
- In-drawer knife storage
- Under-cabinet knife storage
- Wall-mounted magnetic storage where appropriate
- A slimmer knife block
Choose the option based on your kitchen layout and household safety preferences.
Important: Knives should be stored securely and positioned where they cannot be easily reached by children.
6. Make Use of an Empty Counter Corner
Corners are easy to ignore because they aren’t always convenient for everyday tasks.
A small corner organizer, compact shelf, or turntable can turn that unused area into functional storage.
Good candidates include:
- Oils
- Sauces
- Tea
- Coffee supplies
- Small jars
- Seasonings
A turntable is particularly useful when several bottles need to share one area because you can rotate the contents toward you instead of reaching behind everything.
7. Create a Dedicated Small-Appliance Zone
Small appliances are often one of the biggest sources of countertop clutter.
Instead of randomly placing appliances wherever there is space, create a dedicated zone.
For example:
Coffee zone: coffee maker + grinder
Breakfast zone: toaster + bread storage
Cooking zone: air fryer + frequently used accessories
Among the most practical small kitchen countertop organization ideas, creating a dedicated appliance zone can make everyday cooking much easier.
Only leave appliances that genuinely earn permanent countertop space.
For appliances used occasionally, cabinet or pantry storage may be more practical.
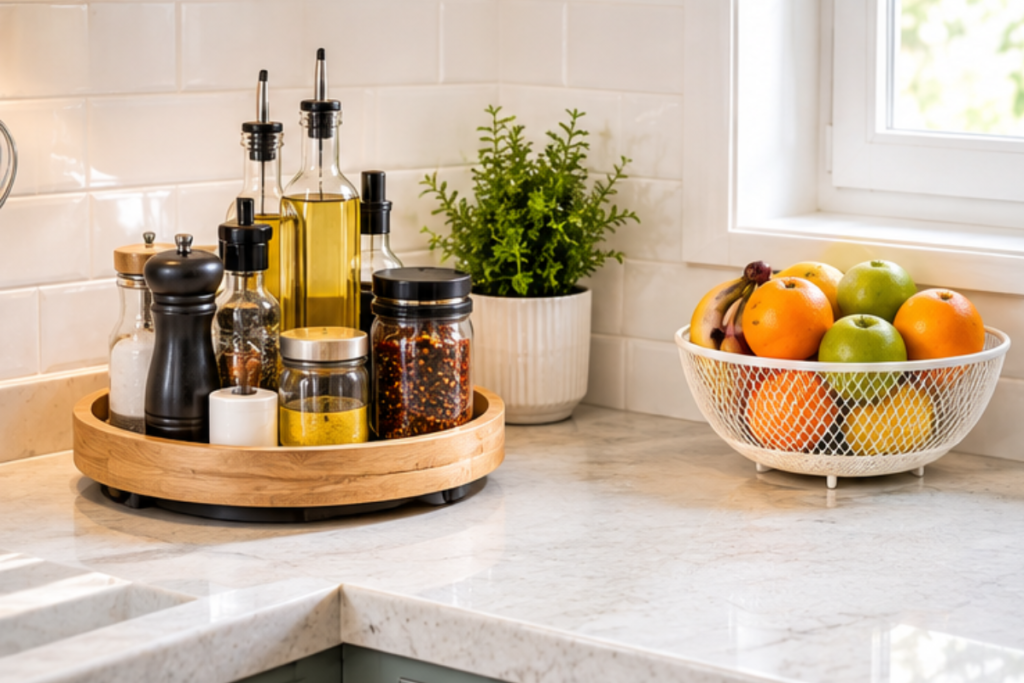
8. Organize Cooking Oils and Sauces on a Tray
Oil bottles and sauce containers can make a countertop look messy even when everything is technically organized.
A simple tray can group them together and create a defined cooking zone.
Choose a tray that is:
- Easy to wipe
- Large enough for the bottles
- Small enough not to dominate the counter
- Stable enough for everyday use
Extra benefit: If a bottle drips, the mess is contained to the tray instead of spreading across the countertop.
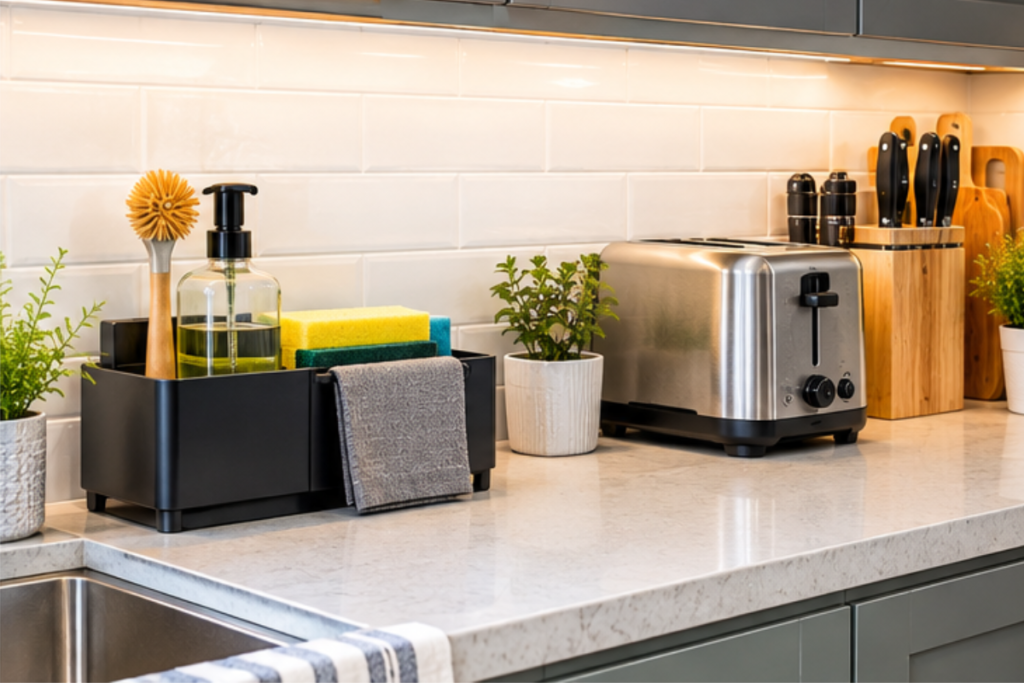
9. Use a Sink-Side Organizer for Cleaning Essentials
Sponges, brushes, dish soap, and scrubbers can quickly create a messy area around the sink.
A compact sink organizer can give these items a designated home.
Keep only the supplies you use regularly near the sink. Extra cleaning products can stay under the sink or in another storage area.
This is particularly useful in a small kitchen because the area around the sink often becomes an accidental storage zone.
10. Add a Narrow Countertop Shelf
If you have some unused vertical space but don’t have enough room for another wide organizer, a narrow countertop shelf can add a second storage level.
A narrow shelf is another simple option when you need small kitchen countertop organization ideas that add storage without taking up much workspace.
Use it for smaller items such as:
- Coffee supplies
- Spices
- Tea
- Small jars
- Frequently used ingredients
Before buying
Measure:
- Countertop width
- Countertop depth
- Available height
- Clearance underneath upper cabinets
A shelf that is technically small can still make the area feel crowded if it is too tall or deep.
11. Move Storage to the Wall When the Counter Is Full
One of the most effective ways to free countertop space is to stop using the countertop for things that can live vertically.
Depending on your kitchen and rental restrictions, consider:
- Wall-mounted shelves
- Pegboards
- Rails with hooks
- Magnetic storage
- Under-cabinet storage
This follows a simple principle:
When horizontal space is limited, use vertical space.
Wall storage is especially useful for lightweight cooking tools and items you reach for frequently.
For renters: Choose removable or low-impact solutions where appropriate and check your lease before drilling or making permanent changes.
12. Create an Everyday Essentials Tray
A small tray can make several unrelated countertop items look like one organized group.
For example, you could place:
- Hand soap
- Lotion
- Small cleaning item
- Dish brush
- Sponge holder
Or create a cooking tray with:
- Salt
- Pepper
- Frequently used seasonings
- Cooking oil
The important part is grouping items according to how you use them.
This makes cleanup easier because several items can be moved together instead of individually.
13. Give Fruit Its Own Defined Space
Fruit often becomes countertop clutter because it doesn’t have a natural storage location.
A compact fruit bowl, basket, or tiered fruit stand can contain it in one defined area.
Choose based on your space
Very limited counter: Small bowl
Vertical space available: Tiered basket
Large family: Larger open basket
Fruit and vegetables: Separate storage based on your kitchen’s needs
Avoid placing the fruit bowl in a location where it interferes with food preparation.
14. Create a Dedicated Charging Zone
Phones, tablets, smart speakers, and other devices can turn a kitchen counter into a cable mess.
If your household regularly charges devices in the kitchen, create a specific charging area.
Use:
- A cable-management box
- Cable clips
- A small charging station
- A dedicated shelf
- A drawer with appropriate cable access
Keep charging cables contained rather than allowing them to spread across the food-preparation area.
Safety note: Keep electrical devices and charging equipment away from water, splashes, and wet sink areas.
15. Create a Daily-Use Zone
The final and perhaps most important idea is to give your most frequently used items a defined home.
Think about what you actually use every day.
Maybe it’s:
- Coffee maker
- Toaster
- Knife block
- Cooking oils
- Utensil crock
- Salt and pepper
- Cutting board
Keep those items together where they are convenient.
Everything else should have a different storage location.
This creates a simple rule:
Countertop space should be reserved primarily for items that earn it through frequent use.
How to Organize a Small Kitchen Countertop Step by Step
If your countertop is currently overwhelmed, don’t try to reorganize everything at once.
When choosing small kitchen countertop organization ideas, focus on solutions that match the way you actually use your kitchen every day.
Step 1: Remove Everything
Clear the entire countertop.
This gives you a realistic view of the available space.
Step 2: Clean the Surface
Wipe the countertop before returning anything.
This is also a good opportunity to notice whether grease, crumbs, or buildup have accumulated underneath appliances and organizers. Regularly cleaning countertop storage pieces can help prevent buildup.
Step 3: Separate Everyday Items
Make a small group of things you use almost every day.
Step 4: Find Another Home for Everything Else
Move occasional-use appliances and unnecessary countertop items into cabinets, drawers, pantry storage, or another suitable location.
Step 5: Create Zones
Group related items together:
- Coffee
- Cooking
- Cleaning
- Breakfast
- Food preparation
Step 6: Use Vertical Space
If you still need storage, consider a shelf, tiered organizer, wall storage, or under-cabinet solution before using more horizontal counter space.
Step 7: Leave Working Space
Don’t fill every available inch.
A clear section of countertop is more valuable than another storage container when you’re actually cooking.
Small Kitchen Countertop Organization Mistakes to Avoid
Buying Organizers Before Measuring
This is one of the easiest mistakes to make.
Always measure the available width, depth, and height before purchasing a shelf, rack, tray, or organizer.
Keeping Every Small Appliance on the Counter
If you use an appliance only occasionally, permanent countertop storage may not make sense.
Using Too Many Containers
Containers can organize clutter, but they can also become clutter themselves.
Use them when they improve access or grouping.
Ignoring Vertical Space
A small countertop doesn’t necessarily mean you need more floor or cabinet space. A carefully chosen vertical solution may give you additional storage without taking up much more counter area.
Turning the Counter Into a Catch-All
Keys, mail, packages, receipts, chargers, and miscellaneous items can quickly take over.
Give these things another designated home.
Professional organizers similarly recommend limiting countertop items to essentials that are used frequently and giving other belongings a specific storage location.
Filling Every Inch
An organized kitchen still needs workspace.
If the countertop becomes completely covered with organizers, you may have technically created storage but lost the surface you need for cooking.
How to Choose the Right Countertop Organizer
Before buying anything, consider these four factors.
1. Measure First
Record:
- Width
- Depth
- Height
- Clearance above
- Clearance beside appliances
2. Think About Access
Ask yourself whether the organizer makes items easier or harder to reach.
An organizer isn’t useful if you have to remove three things to reach the item behind it.
3. Match the Organizer to the Problem
| Problem | Possible Solution |
|---|---|
| Small bottles everywhere | Turntable or tray |
| Spices taking over | Tiered organizer |
| Coffee supplies scattered | Coffee station |
| Utensils filling drawers | Countertop crock |
| Sink area cluttered | Sink organizer |
| No vertical storage | Countertop shelf |
| Too many appliances | Dedicated appliance zone |
| Cable clutter | Charging station |
| Empty corner | Corner organizer |
4. Consider Cleaning
Kitchen organizers collect dust, grease, and food particles.
Look for materials and designs that are easy to wipe down, especially around cooking areas.
What Should Stay on a Small Kitchen Counter?
There’s no universal answer, but a useful rule is:
Keep it out if you use it frequently and it would be inconvenient to retrieve every time.
Good candidates might include:
- Coffee maker
- Toaster used daily
- Knife storage
- Frequently used cooking utensils
- Cooking oils
- Salt and pepper
- A small fruit bowl
But if something is rarely used, consider storing it elsewhere.
The goal isn’t a completely empty countertop. It’s a countertop where every item has a reason to be there.
Frequently Asked Questions
What are the best small kitchen countertop organization ideas?
The most useful approaches usually include decluttering first, creating dedicated zones, using vertical storage, grouping everyday items on trays, and moving rarely used appliances off the countertop.
How do I organize a small kitchen countertop without making it look crowded?
These small kitchen countertop organization ideas can work especially well when cabinet and drawer space is limited.Start by limiting the number of items that remain on the counter. Group related essentials together and use compact vertical organizers instead of adding several separate containers.
Should small appliances stay on the countertop?
If you use an appliance almost every day, keeping it accessible may make sense. Appliances used only occasionally can usually be stored elsewhere if you have suitable cabinet or pantry space.
How can I get more countertop storage without remodeling?
Use vertical solutions such as narrow countertop shelves, tiered organizers, under-cabinet storage, wall-mounted solutions, or compact trays. These can add organization without changing the kitchen layout.
How do I organize a small kitchen counter with limited cabinets?
Prioritize the items you use most often, then look for unused vertical and wall space. A dedicated coffee station, tiered shelf, utensil crock, or narrow organizer can help without requiring additional cabinets.
What should I keep on my kitchen counter?
Keep frequently used items that would be inconvenient to store away, such as a daily-use coffee maker, knife storage, cooking utensils, or frequently used oils. Everything else should earn its countertop space based on how often you use it.
How do I keep my kitchen countertop organized?
Give every countertop item a designated home and return things after cooking or meals. A short daily reset can prevent clutter from building up again.
Are countertop organizers worth it?
They can be useful when they solve a specific problem such as poor visibility, limited vertical storage, or scattered small items. Measure first and avoid buying organizers simply because they look attractive.
Related Small Kitchen Organization Guides
If you are working on a small kitchen, these GRAPCY Hub guides can help you organize other storage areas:
Final Thoughts
A small kitchen countertop doesn’t need to hold everything you own.
The most effective approach is to decide what you actually use, create simple zones, and make better use of vertical and overlooked space. A small shelf, tray, turntable, or organizer can help—but only when it solves a real problem.
Start by clearing the countertop completely. Then bring back the items you use most often and give everything else a proper home.
The best small kitchen countertop organization ideas don’t simply make the kitchen look cleaner. They make cooking, cleaning, and everyday routines easier.
And that is ultimately what good kitchen organization should accomplish.
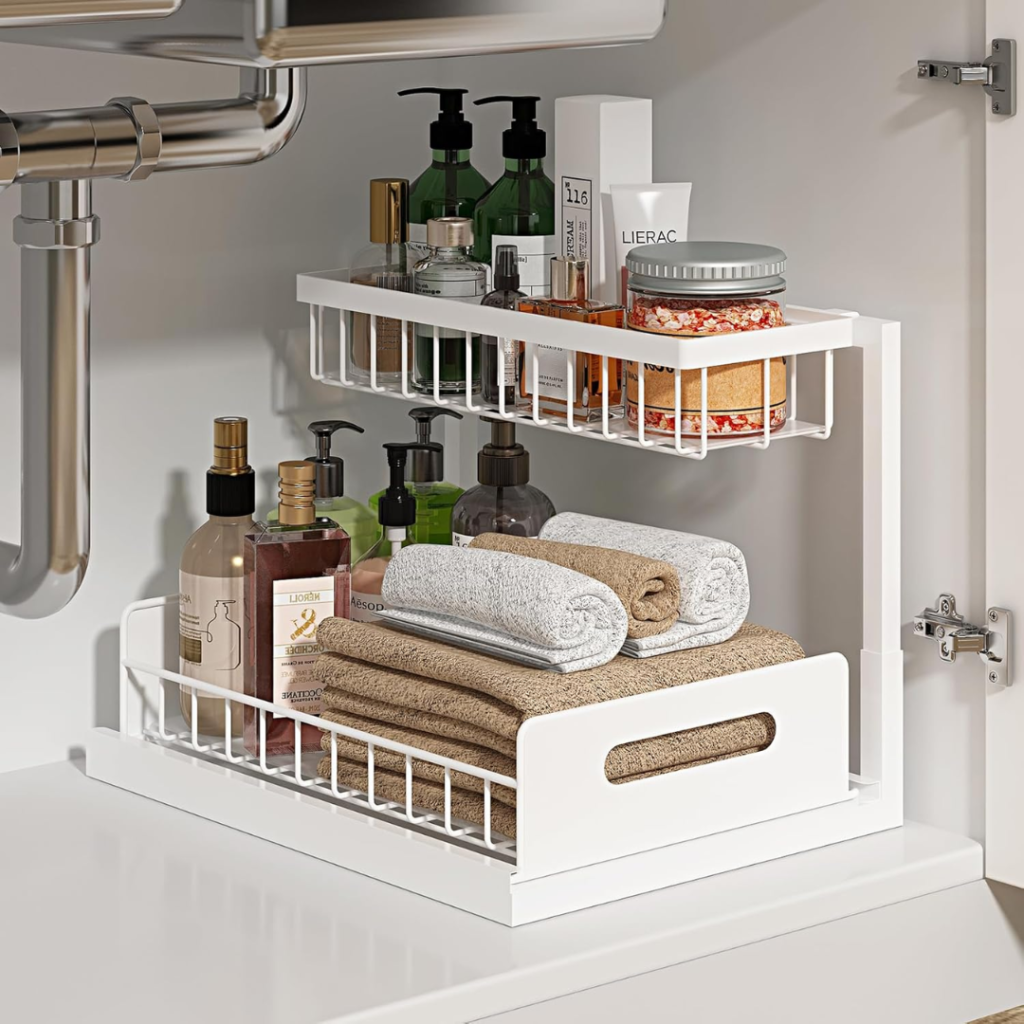
Sink Organizer
Key Features:
- L-Shaped 2-Tier Design – Makes use of vertical space while leaving room for plumbing and taller bottles.
- Pull-Out Drawer – Slides out from either side for easier access to items at the back.
- Tool-Free Installation – Includes suction cups and adhesive for stable placement without drilling.
- Sturdy & Rust-Resistant – Steel construction with a water-friendly grid design and removable pads.
- Versatile Storage – Great for under-sink cabinets, kitchens, bathrooms, and laundry areas.
- Size: 14.2 × 10.6 × 11 inches; bottom tier fits bottles up to 8 inches tall.
As an Amazon Associate I earn from qualifying purchases.